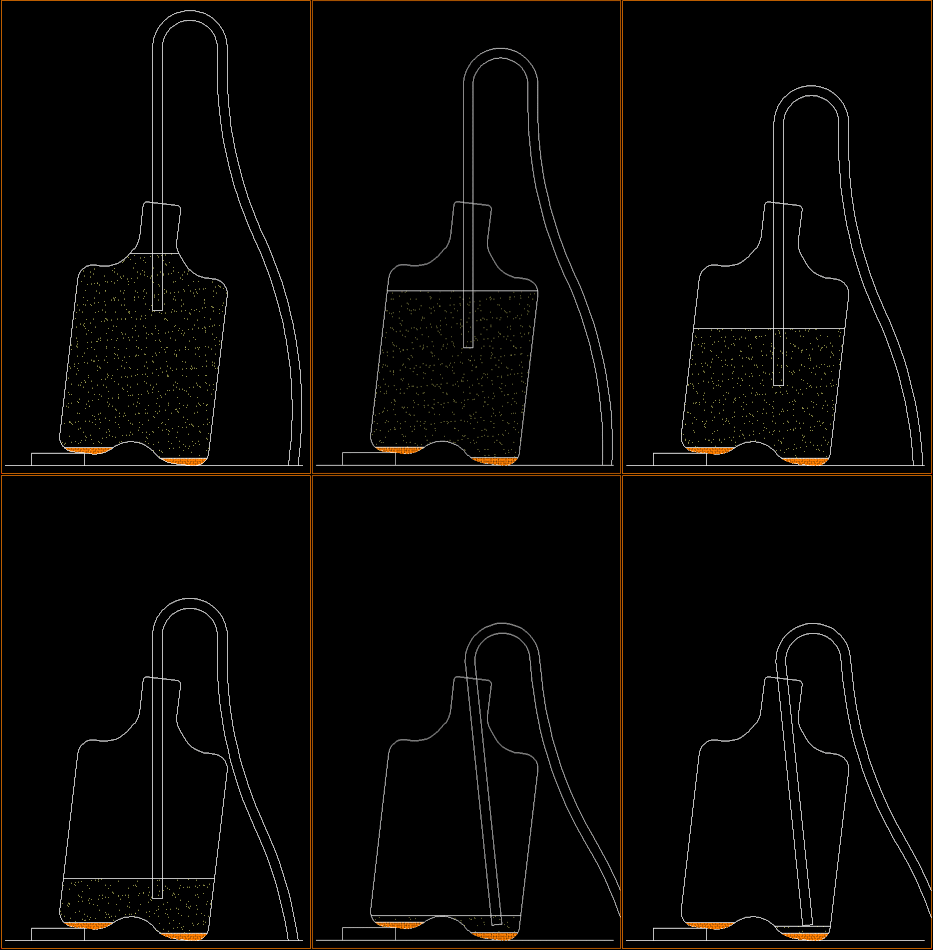
NO CHILL!

Chilling the wort is a step in the beer making process that does not agree with me. I don’t like it! “In the beginning” I found out the hard way that the tap of my brewing kettle could come off for cleaning purposes. Unfortunately I did not know that and it accidentally came off while chilling the beer. That was the day that I learned how a kitchen floor of sticky boiling wort looks like. I was too upset to make a picture, which would be funny right now, but believe me, it was not a pretty sight.

Chilling is such a hassle!

So the first impression was not a good one. After that I paid more attention and managed to use my tools in a proper way.

But still I had my doubts. One of the main reasons for chilling that is mentioned everywhere is to avoid infection with bacteria. This does not make sense to me at all. What could happen when I put the boiling wort directly in a container, close it, and let it cool down? The container would be sterilized by the heat. As a matter of fact; I believe that the chilling process can actually introduce infections. Just think about it: All the time that you are chilling, the wort is accessible by the outside world! And at a very likeable temperature as well!

The second argument mentioned in my books is maillard products. Nothing is really wrong with them, the only thing is that they produce colour. Well I don’t really mind if my beer is a bit darker than it should be. I am an amateur.
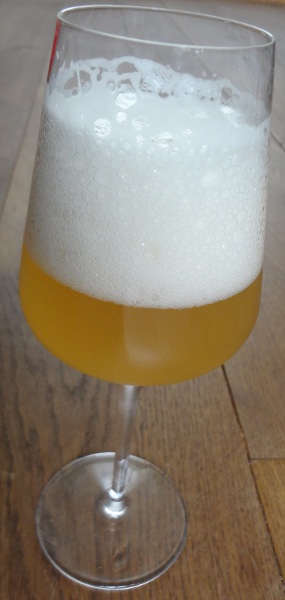
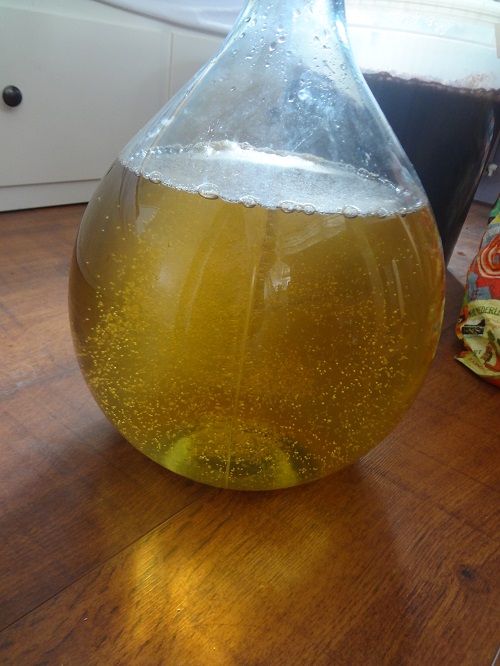
As you can see from the picture, but this is a non chilled white beer. Looks fine to me.

So, from my books I see no real downsides. Let’s check the internet!

Maybe not….. As usual you can find many people who have no problem at all and just as many who believe that it is impossible and that you will get incurable diseases if you dare to try it. I wish that somebody could invent a “Bullshit filter” for Google.

This site may be the one that I would recommend but that is only because it agrees with me. Let that be clear; I do not claim to have possession of the truth (If there is one.) I am just trying.

And that is what I have done. After thinking about the consequences I decided that there may be another issue: Hops! What would happen if they remain in hot wort for a longer time?

For the bittering hops I don’t see a problem. What would happen to them after 90 minutes boiling?

Aroma hops is probably a different story. When they are chilled the effect on the bitterness is limited but when they are not chilled they would add all their bitterness to the wort. I guess that that problem is solved when you remove them after boiling. However, there is a second problem. What about the aroma? Probably this will disappear. So aroma hops are a bit useless if you don’t change something. They don’t add bitterness and the aroma is also gone.

What I have done so far is replacing the last hop gift for a dry hop gift. Another option could be to boil the aroma hops separately the next day in a little water for 5 minutes (or what your recipe says) and then mix it with the cooled wort so it cools down instantly.

You can talk the talk, but have you walked the walk?

As you may have guessed I am not so fond of the internet. It is almost impossible to determine which information is useful or if somebody’s nephew heard it from somebody’s sisters friends brother etc..

In this case I can say that I have made 5 different beers without chilling them and I have not had a problem yet. At this moment I only see positive points:

  • You don’t need cooling equipment
  • You save time
  • You save a lot of cold water
  • You decrease the risk of infection

I realize that making 5 different beers is not a lot but for me it is enough to say that I will not chill anymore.

Cheers

Hans

Posted in Bira | Yorumlar Kapalı

Il secondo mozzarella

The first time I made mozzarella something obviously went wrong, so let’s try again! First I had to find out what I did wrong because I believe that I followed the recipe pretty good.

Since the first steps in the making of this cheese are not very special I already came to the conclusion that the problem was in the stretching part. When I was making the first cheese I realized that the water that I used was not hot enough and I had to heat it up. All this time the curds were in the (not too) hot water which turned very white.

So I looked for some tips on the web. I found this video which was very helpful. (Apart from the fact that it is from Fahrenheit country) It taught me that the water should be really hot and that you should place the curds in it for only a short time. It also shows very well how to knead and form the cheeses. This part is described very poorly in the books that I have.

The lady in the video has made some changes compared to the recipe that I used. Therefore I would like to rewrite that recipe with her method.

Ingredients

  • Citric acid 1 ½ tsp
  • Milk 6L
  • Calcium chloride 1,25 mL
  • Rennet 1,25 mL
  • Salt +/- 10 gm
  • Bowl of ice water

Procedure

  • Clean equipment.
  • Dissolve Citric acid in a little water
  • Mix Citric acid in the milk
  • Mix calcium chloride with a little water and add to milk.
  • Warm milk slowly to 31 C. At this time you can already see some solids forming
  • Mix rennet with a little water and add to milk
  • After 15 minutes, check for a clean break. If no clean break, wait for 5 minutes more.
  • Cut curds in 3 cm cubes.
  • Heat the curds slowly to 41 C. This should take 20 minutes.
  • Remove (Do not throw away) the whey from the curds and let it drain in cheese cloth for 15 minutes
  • In the mean time heat part of the whey up to about 80 C and keep it at that temperature.
  • Break the curds in big pieces and mix in the salt.
  • Place enough curds for 1 cheese in a big spoon and dip it in the hot whey for about 30 seconds to a minute.
  • Wear heat resistant gloves and knead the cheese as if it was dough, folding it a few times.
  • When the cheese becomes too cold, place it in the hot whey again for 20 seconds or so.
  • When the cheese is smooth and shiny you make it into a ball.
  • Place the cheese in a bowl of ice water for 15 minutes.
  • Continue with the next spoon of curds to make the next cheese.
  • Eat immediately or wrap and refrigerate.

Since I use raw milk I did not add the Calcium Chloride but with the above recipe I managed to make good mozzarella cheese. Learning all the time!

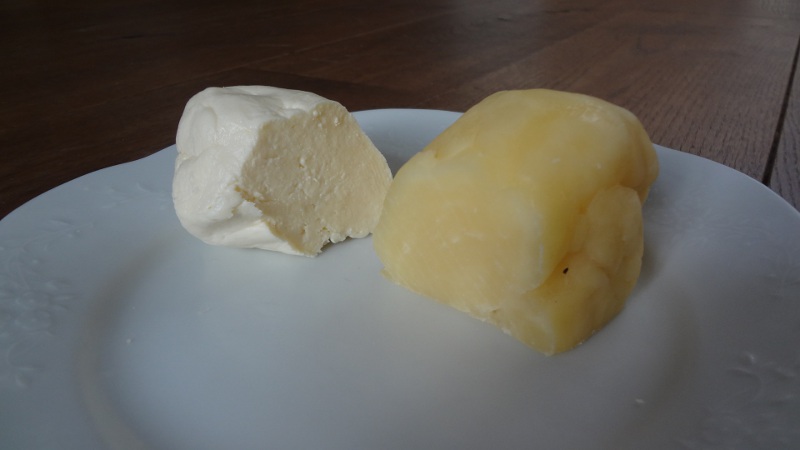
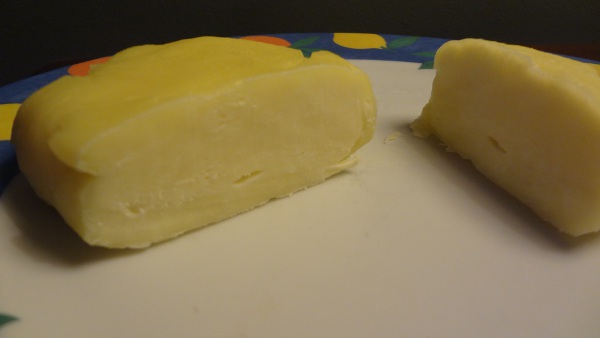
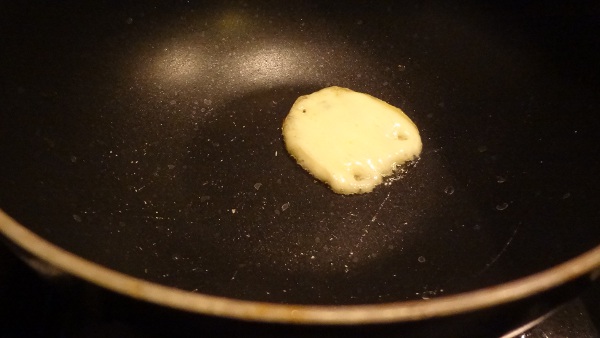
Here is the difference between a short dip and a long bath! The yellow ball from last time tasted nice but it was definitely NOT mozzarella!

Need I say more?

Buon appetito!

Hans

Posted in Peynir | Yorumlar Kapalı

The drink of the gods

It is finally ready. Maybe it was ready some time ago but it does not hurt to be a little patient. But here it is: The mead!

The goal was to make a light wine but in this respect I underestimated the body that honey gives to the final result. I thought that since it is 72% sugar which would be converted to alcohol and CO2 that there would not be much body left.

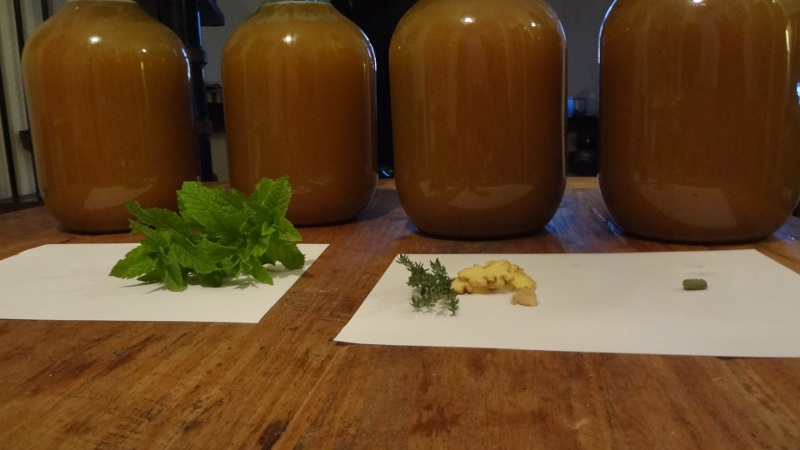
But here are the results. I made 4 versions. Here you can see the recipe.

Plain (No additions),              Mint,                Ginger (+ a little thyme),                  Hop

Since they are very similar I will describe the common features and then the differences.

I don’t have any contacts with the gods so I did not know whether to drink it cold or at room temperature.

I came to the conclusion that it is probably a choice that everybody should make for themselves. The most logical choice is to drink it at room temperature as a desert wine or liqueur. If you want you can add a little sugar in your glass to make it into a sweet desert wine. But since it is not very sweet you can also drink it cold.

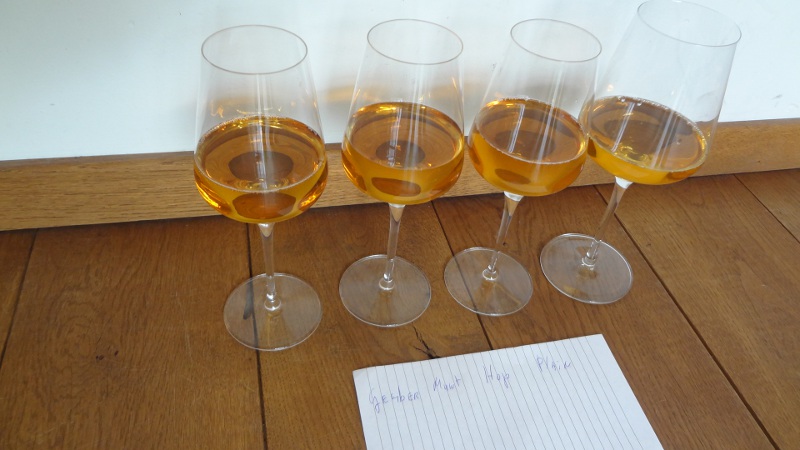
Cold or warm, they all are heavy, full bodied, well balanced, little sweet, little acidic. They give the impression that there is a lot of alcohol in it but I estimate that it can be maximum 11,5%. The colour is what you would expect from a drink for the gods. It can only be described as a warm gold or whisky.

There are some differences between the 4 versions. The version with hop deviated a bit from the rest although there was only 1 hop pellet in 5 litres.

Plain: Most taste of honey. Bit sweeter than the others. Most accessible. My favourite.

Ginger: No sign of ginger in aroma or taste at all, but nice and complex taste. Little bit freshness.

Mint: No sign of mint. Bit more accessible, pleasant sweetness, a little freshness.

Hop: No sign of hop. Smells remarkably like whiskey and has a feeling of much alcohol. Most suitable for drinking at room temperature.

I have made mead before and I found that people either like it a lot or not at all. You cannot compare it to normal white wine. Maybe with heavy desert wine but the way I make it it is not sweet. Off course you can add sugar to your glass when you drink it.

I like all 4 versions. They are not very different from each other, but my preference would be the plain.

Cheers

Hans

Posted in Şarap | Yorumlar Kapalı

Buy a new one!

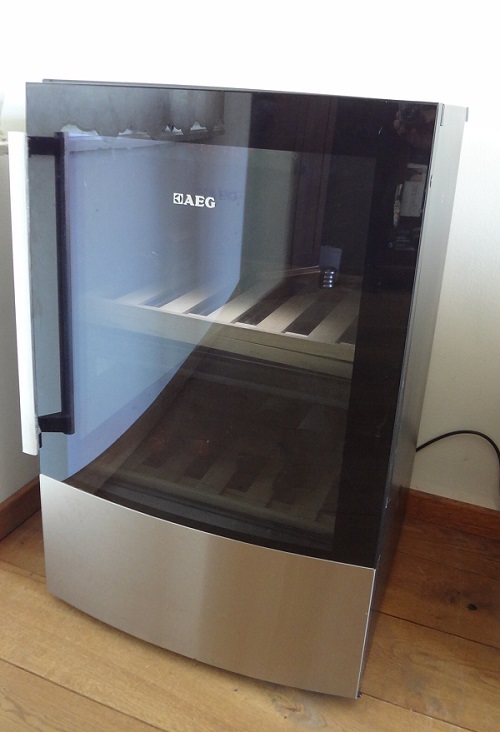
A few years ago I bought myself a present: A wine refrigerator!

I was very happy with it but also a bit ashamed of this snobbish piece of equipment which nobody really needs. You don’t get the combination of these feelings very often.

Shortly after buying it I realized that it is a great place to let cheeses ripen. Only at that moment I started making cheese. The refrigerator was suddenly a tool that I could not miss.

A few months ago I noticed that there was something wrong. It became more noisy and the motor would not stop running. The motor was also very hot. It even had big problems to keep the temperature at 18C.

I googled to see if I could find out what the problem could be. The motor was running, the thermostat was working… Many more options are not available and based on my research I concluded that the coolant had leaked out of the system.

On some Dutch “do it yourself” sites I saw the advice “Throw it away and buy a new one!” because the repair would be too expensive.

I was pretty angry about it because it is only 4 years old! It is an AEG so I expect German quality. Unfortunately the German quality was “made in China”.

The first thing I tried was kicking it very hard but that did not help. I googled some more and I found some movies that showed that it is not so difficult to refill a refrigerator. Nobody mentioned anything about fixing the leak but after some more googling I read somewhere that the leak could be extremely small.

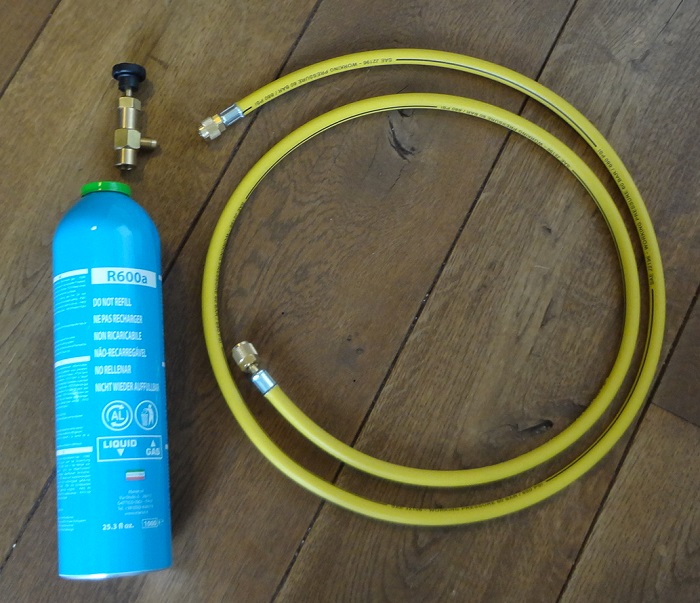
I decided to have a look for the equipment and try to fix it. I found a site with a copper filler tube which you have to solder to the refrigerator, a gas bottle and a tap for the bottle. That looked promising so I ordered them. I decided that I could find a tube needed to connect the filler tube to the tap in a hardware shop.

That was a mistake. The thread of the copper filler tube mentioned ¼” but it definitely was not the G¼” that is available. It turned out to be SAE which is not used regularly. But luckily I found a website that sells a tube with this thread. By now I spent 100 euro without any guarantee.

Now was the moment of truth. I cut the filler line and soldered the filler tube in it. This went surprisingly easy considering I have not soldered before.

On the refrigerator is mentioned that I should get 25 gram of the gas R600a in it.

I connected the can, the tap, and the tube to the filler and opened the tap. I could hear the gas flowing but it was not much. I weighed the can and it was only about 12 gram lighter.

Then I remembered that the motor should be running!

I connected it again and switched on the refrigerator. This time I could hear that the motor sucked in more gas.

I disconnected everything and closed the filler with its cap.

This time approximately 30 gram went in. I did not have any patience so I let the refrigerator running. It worked great! The outside became warm and the temperature in the refrigerator dropped really quick.

It is working for 2 months now and I am sure that it is working better than when it was new. It is cooling faster and it is not as noisy. And the funny thing is that the filler is still there! I have enough gas for 10 more refills so if it happens again I can simply fill it again.

You can believe that I am really happy with the result. I can make cheese again.

Hans

Read the update

Posted in Bira, Peynir | Yorumlar Kapalı

The tastiest rubber ball

The goal was mozzarella but some details decided otherwise.

I don’t know why, but so far I have not made mozzarella. Maybe it is because you can buy it for extremely little money and I don’t think it is a very special cheese. As a matter of fact; the cheap mozzarella’s have no taste at all. It seems like a complete waste of good milk.

Secondly, it requires gloves to protect your hands from the high temperature. Since my house is filled with all kinds of stuff for making cheese, wine and beer I could not be bothered with buying more.

But because I like to try to make all kind of cheeses I could not skip mozzarella because the way it is made is completely different from all other cheeses I tried before.
Ok. I’ll burn my hands a little.

Here is the recipe that I used in my own words:

Ingredients

  • Citric acid 1 ½ tsp
  • Milk 6L
  • Calcium chloride 1,25 mL
  • Rennet 1,25 mL
  • Salt 90 mL (Yes. That is what the recipe says. I used 90 gm.)
  • Bowl of ice water

Procedure

  • Clean equipment.
  • Dissolve Citric acid in a little water
  • Mix Citric acid in the milk
  • Warm milk slowly to 31 C
  • Mix calcium chloride with a little water and add to milk
  • Mix rennet with a little water and add to milk
  • After 30 minutes, check for a clean break. If no clean break, wait for 15 minutes more.
  • Cut curds in 1,25 cm cubes and wait for 5 minutes.
  • Heat the curds slowly to 41 C. This should take 20 minutes.
  • Stir for 20 minutes more and then leave it for 5 minutes
  • In the same time boil 4 L water and dissolve the salt in it.
  • Remove the whey from the curds and let it drain in cheese cloth for 15 minutes
  • Place the curds on a cutting board and cut it in 2,5 cm strips.
  • Place the strips in a large bowl and pour the hot salt water on it.
  • Wear heat resistant gloves and stretch the strips into long ropes. The cheese becomes soft in the hot water. To test if it is ready for stretching you can try it with a small piece of cheese. If it does not stretch or breaks you should wait some more.
  • When the cheese is smooth and shiny you make it into a ball or make several small cheeses.
  • Place the cheese(s) in a bowl of ice water for 5 minutes.
  • Eat immediately or wrap and refrigerate.

Ok. That is the way you should do it. But I ended up with absolutely no mozzarella. It was actually much better than any mozzarella I ever ate.

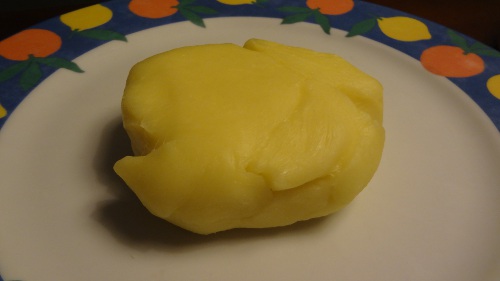
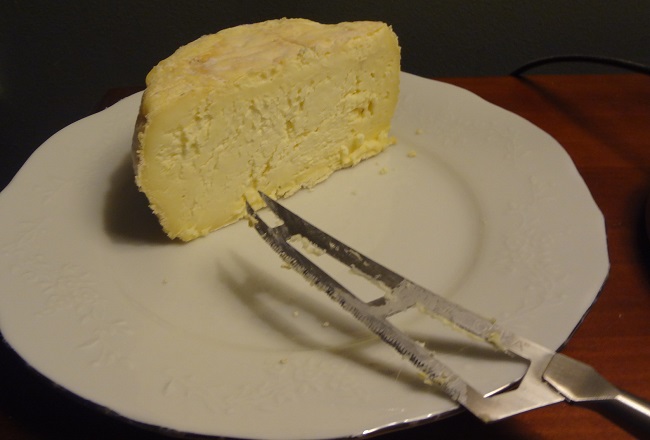
It ended up with the texture of a rubber ball. The colour was more yellow than white. The rind was firm like plastic but very thin and tasty. (Perhaps the cheese can even be kept for a few weeks.)

The taste was a bit sweet, a little nutty, milky and fresh. Very well balanced.

I tried to warm it to see if it can be used on a pizza and it melted very nicely.

Well, I did not make mozzarella. Now the question is of course; What happened?

There are some things that I did not do according to the recipe:

  • When I started I noticed that I did not have enough citric acid. (Unbelieveable that I could run out of that.) So I used 2 tsp tartaric acid which is a little weaker than citric acid. I don’t think that it matters when you use it in 6 L milk. But who knows? Small details can make big differences.
  • Since I use fresh milk I do not use calcium chloride.

These are the changes that I was aware of but I don’t think that they make a lot of difference.

I think that the greatest influence was the stretching.

I divided the curds in 3 pieces and when I wanted to stretch them they would only stretch for about 20 cm and then they broke. I waited for a while but it did not change a lot.

I decided to heat the curds some more and then they would stretch a lot better. Even better than chewing gum.

I believe that I tried to stretch them too much or often and that is why it became rubbery. But next time I am doing that again because the cheese was fantastic!

Hans

P.S.

In the mean time I have learned what I did wrong. If you want to make a proper mozzarella look here.

Posted in Peynir | Yorumlar Kapalı

Prison champagne

The reason that I called this sparkling white wine “Prison champagne” is this image in my head. Champagne is for special occasions. Something you drink at a celebration. I can imagine somebody in jail sipping the bubbles from a fancy champagne glass having a great time because he has made champagne without being caught.

It is one of my favorite wines and I changed the recipe a few times to get the right amount of bubbles. You will be surprised how close this gets to expensive sparkling wines.

A “secret” ingredient that champagne shares with beer is CO2. You may say that there is nothing secret about CO2, but several studies imply that it causes alcohol to get in the blood faster with the obvious light headed result sooner.

The recipe:

Normally I would say that recipes do not work because of the variation in the ingredients but since the main ingredient is a juice that is always the same, you can follow this recipe.

This recipe is for 10 liter.

Ingredients:

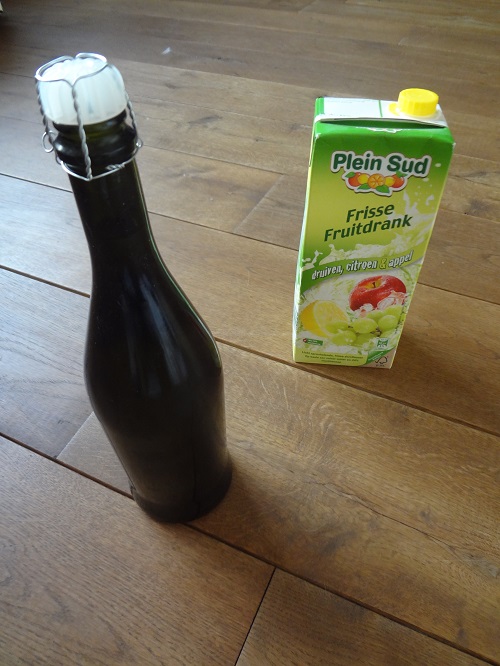
  • 10 liter Frisfruit juice from Lidl. It is made of concentrated grape/apple/lemon. It contains 110 grams sugar/liter.
  • 700 grams sugar
  • 30 grams Citric acid
  • Champagne yeast (rehydrate in a little water 15 minutes in advance)
  • 1 tsp Yeast nutrition (just to keep the yeast happy. Maybe not even necessary)

Method

  • Stir all the ingredients in a bucket until they are dissolved and add the yeast.
  • After the first fermentation put it in a 10 liter demijohn, leaving most of the lees in the bucket.Let this ferment until it is finished.
  • This wine gets clear rather quick. Only a few months…
  • Now you have a white wine which has maximum 10% alcohol in it. Probably a little less due to evaporation.

You can drink this, but you can make it in to Prison champagne as follows:

  • Rack it into another 10 liter bottle in which you have put 250 grams sugar.
    You don’t have to be extremely careful because you would want to have a little living yeast in there. (Yeast will form in the bottle anyway.)
  • Stir well to dissolve the sugar.
  • Immediately after racking clean your champagne bottles and fill them.
  • Close them with champagne corks and a wire cage, or with crown caps.
  • Store them in a place with a constant (room) temperature to keep the yeast happy.

You can drink this wine after +/- 6 months but if you leave it longer it improves. For some reason the bubbles seem to become finer.

Notes:

  • Use champagne bottles. Normal wine bottles are not strong enough.
  • If you use crown caps, make sure that your bottles are suited for them.
  • The same goes for corks. Not all bottles are the same and some will not close properly.
  • Make sure that the bottles are closed properly. If you are not sure, store them in a “safe” place. I can tell you from experience that an exploding cork makes a huge champagne fountain. It is hilarious…… When it happens to someone else!
  • The fermentation in the bottle creates the CO2 gas but also leaves a thin layer of lees. Just like in beer making. So you have to handle the bottle carefully when opening and pouring to disturb the lees as little as possible. Champagne yeast forms a thin solid layer but will form a cloud in the last glasses.
    To avoid this you can pour the bottle in another empty bottle discarding the lees.
  • I have 3 different acids but this wine should be made with citric acid only. I tried it also with malic acid but it is a little less fresh.

In case you are interested; Here are the calculations:

Acidity

I measured the acidity and the value was about 4,5. This is a little low so I added 3 gr/l citric acid. Since citric acid is stronger than tartaric acid, the acidity of the finished wine is approximately 8.

Alcohol

In the table you can see that 110 gr/l sugar gives an alcohol percentage of 6,1%. First I added 70 gr/l so the alcohol percentage would be around 10%.
When I bottled the wine I added 25 gr/l again, so the total amount of sugar is 205 gr/l. In the table you can see that this gives about 11,5% of alcohol.
Here is how to use the table.

Cheers

Hans

Posted in Şarap | Yorumlar Kapalı

How do you get a white Stilton?

Well, not the way I tried.

Usually I do not consider cheeses that turn out a little different to be failures. They will still taste nice and are just as good as the cheese I intended to make. But this one I really classify as a failure.

In the past I made Stilton before. It is not my favorite blue cheese but I try to make many different ones to find out which I like best. In the book of Tim Smith there is also a recipe for a white Stilton. I don’t know why, but it grabbed my attention and I wanted to make it for a long time.

The main difference is that blue Stilton is blue, and white Stilton is white.

And there is the problem. Blue Stilton is blue because you give it P. Roqueforti. When these bacteria start growing they protect the inside of the cheese by forming a blue rind. In the white version you have to avoid all the bugs that may have an appetite for cheese. There is no real protection.

As a matter of fact the recipe states that you should clean the cheese every week with a mild brine solution.

And that is where everything went wrong. The outside of the cheese is already a bit moist and soft and by washing it every week you create the perfect conditions for B. Linens. The creator of stinking cheeses.

I was hoping that it’s influence would be limited to the outside but it was no good. White Stilton is fresh, and acidic and the B. Linens odor does not suit that taste at all.

To be honest; I was sad. I did not want to eat it but I also did not want to throw it away. I am very bad at throwing things away in which I invested a lot of time.

So I left it in the refrigerator. And it improved. More and more it turned into a stinking cheese. The inside is becoming a bit more creamy and it is ok. Not great, but not bad.

Unfortunately I don’t have a solution for the problem. I will not be able to make this cheese under home conditions. Fortunately I don’t think it would be one of my favorite cheeses so I will consider it a lesson and not make it again.

However if I would try it again I would make it just like the blue version but I would not pierce it, so the outside is blue and the inside remains white.

But I am not going to try again.

Hans

Posted in Peynir | Yorumlar Kapalı

A story about emptying bottles

In the beginning I was unsure. I did not know what I was doing. Maybe I still do not know what I am doing.

I am sure that I don’t know what I’m doing but the world can forgive me.

As is the case in the wine and beer making hobby. There are many ways to achieve wine and beer and as long as that is the result, the way it got there is less important.

When I started making wine I did not know anything. Even the simplest things I had to learn. I read books and followed their advice to the letter. For example racking: According to some sources you should rack wine every 2 months until it is clear enough to put it in a bottle. Other sources are easier and say for example every 4 months.

Well I changed my mind about that a long time ago. I rack as little as possible. In some cases only 2 times. I have several reasons:

  • First of all, I don’t really like the job. Especially since….
  • I don’t think it is necessary.
  • Every time you rack you lose some wine
  • Every time you rack you introduce oxygen in the wine which is not good in this stage
  • Every time you rack you run the (small) risk of introducing bacteria. I never had a problem, but why risk it if you don’t need to?

So my schedule is roughly like this:

  • In case of fresh fruit I take the fruit out of the most one week to ten days after the start of fermentation. I would not call this racking. You filter out the solid parts of fruit with cheese cloth and a funnel. Squeeze the cheese cloth to get as much juice as possible. This is usually a job which I do not like. It is sticky and a bit messy. Just to be sure I use a little sulphite. One gram per 10 liter.
  • After the fermentation is more or less finished there is a layer of yeast on the bottom of the demijohn. The most does not have to be very clear. This can be after one month, or 6 weeks, or 2 months if that is more convenient. Then I rack for the first time. I take as much of the most as possible and I don’t care if a little lees are transferred to the clean bottle.
  • Now I wait until the wine is as clear as it will be. This can take a long time. 6 Months? 1 Year? Maybe longer. A thin layer will form on the bottom of the demijohn. Now I rack for the second time. I add 0,5 gram sulphite per 10 liter. I try to get as much of the wine as possible without disturbing the layer on the bottom.
  • The next day I will rack the wine in bottles.

Although it seems simple there are some tips that I would like to give:

  • If you have never done it; Try with a demijohn of water so you know what to expect. You can dissolve dried bread crumbs in the water the day before to mimic the lees on the bottom.
  • Place your demijohn with wine tilted to one side at least 2 weeks before racking. Try not to disturb the lees.
  • I do not use the cap on the siphon which you are supposed to place in the layer of yeast. You can get more wine without it.
  • Make sure that you can see the level of the wine in the demijohn. For this purpose I cut big holes in the plastic cover.
  • Pay attention! You have to rack everything in one go. Start a few cm underneath the surface and follow the surface with the hose down to the deepest point in the demijohn. Do not let the hose come above the surface because it is not easy to restart without disturbing the lees.
  • Do not be afraid to suck up some of the lees in the first racking. If you are too careful you will throw away too much wine.
    In beer making especially it makes sense (to me) to rack as much as possible. Too bad if a little yeast is also racked. Who cares? There will be sediment in the finished bottle anyway!
  • Starting can be difficult with a manual racking hose. When you suck too much wine in the hose it will end up in your mouth (which is not a real bad thing) and if you suck too little wine in the hose it will flow back in the demijohn, possibly disturbing the lees.
  • Starting with an automated siphon can be troublesome as well. If you pump too violently you can also disturb the lees. Especially if you have a small demijohn.

Racking is not too difficult but it is also very easy to make a small mistake and if you do make a mistake you probably have to rack an extra time.

(All the mistakes have been described out of personal experience.)

Cheers

Hans

Posted in Bira, Şarap | Yorumlar Kapalı

Dutch courage

In the English language there are some flattering sayings about the Dutch. Apparently they are coming from a period in time where the Dutch and English were fighting each other over world domination.

  • Dutch treat: Stingy people who pay for their own meal when going out.
  • Double Dutch: Incomprehensible talk; gibberish
  • Dutch generosity: Stinginess
  • Dutch headache: Hangover
  • Dutch nightingales: Frogs

There are some more but they are less funny.

Probably my favorite is: Dutch courage: Courage inspired by drunkenness or drinking liquor.

It made me think because there is so much truth in it. Alcohol obviously does a lot to the mind. Some men in positions of great power were known to love a good glass. In many cases alcohol would have played a part in their decision making.

How different would the world look if alcohol would not have been there! Boris Jeltsin would never have ruled. Maybe the Sovjet union would still be there. Would Europe speak German if Winston Churchill and Stalin would not have had a “few” drinks together? Or even Russian?

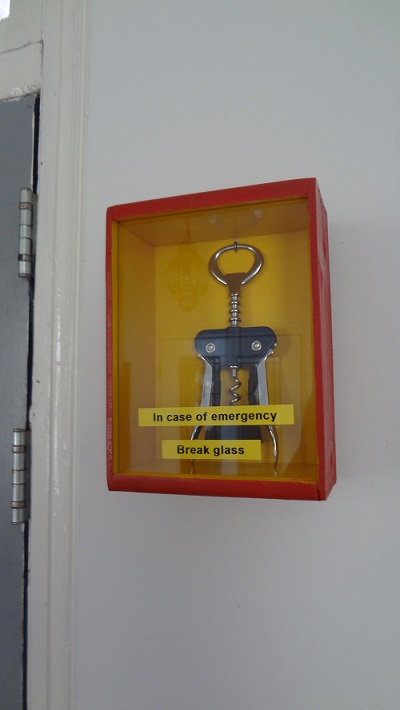
How did I get in this state of mind? Well.. A few years ago I already had an idea for a small hobby project. A little joke. A break glass box with a corkscrew!

I had some wood from a wine bottle box, and I bought some small things and I started making it. In the past I did not have patience but now I made the box quite relaxed. I took the time to sand it and paint it. I was pretty pleased with my work. And when it was finished I placed the stickers with the text rather slanted. Grmbl.

But when I looked at it I realized that although it started out as a joke, there is actually some truth in it. Which is not uncommon for jokes. What is better than sitting down with a nice glass of red wine when you feel stressed after a busy day?

Would it not be good to have a (last?) drink before you had to go to war to fight the English in a fragile wooden ship?

And wouldn’t it be an emergency if you could not open the bottle?

Cheers,

Hans

Posted in Bira, Şarap | Yorumlar Kapalı

Shards bring luck!

Scherven brengen geluk! (The Dutch version) I had no idea that this also is a saying in English. And apparently also in German: “Scherben bringen Glück”.

The Dutch experts on language seem to have different thoughts about the origin and meaning, and I am not going to speculate.

One thing is for sure; shards usually do not make beer or wine makers happy.

Which brings me to the failure of today:

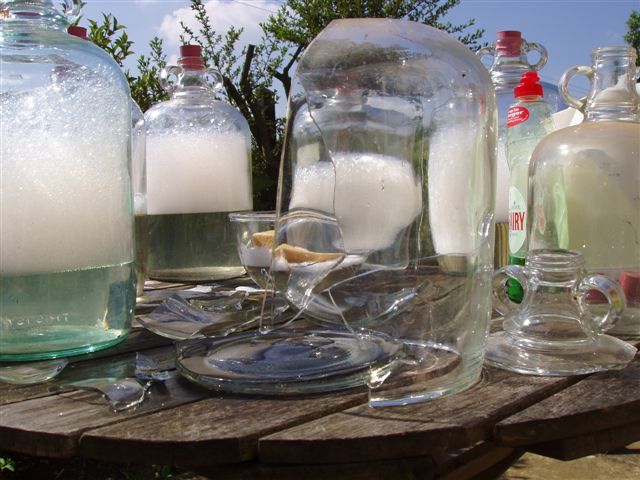
I found this picture on the internet. I have not made this failure but other people did so I fit it in the failures series.

The person wanted to clean several old dirty demijohns. By the writing style I am going to assume it is a woman. (Excuse me if I’m wrong) She used boiling water and one of the demijohns broke. She explained that she did not use the hot water on the outside of the demijohn but only on the inside. Her advice therefore is: Also use the hot water on the outside.

Well, here is my advice: DO NOT USE HOT WATER TO CLEAN DEMIJOHNS!

They are not made for it. They are not meant for hot water and you also cannot put hot wort in them! You will not be the first who has to clean the best beer ever made from your kitchen floor.

I have to give her credit for one thing though. She found that cleaning the demijohns with vinegar and uncooked rice worked very well. I have not tried it myself because I never had any problems with stubborn dirt in demijohns but I will definitely try it if needed.

Hans

Posted in Bira, Şarap | Yorumlar Kapalı