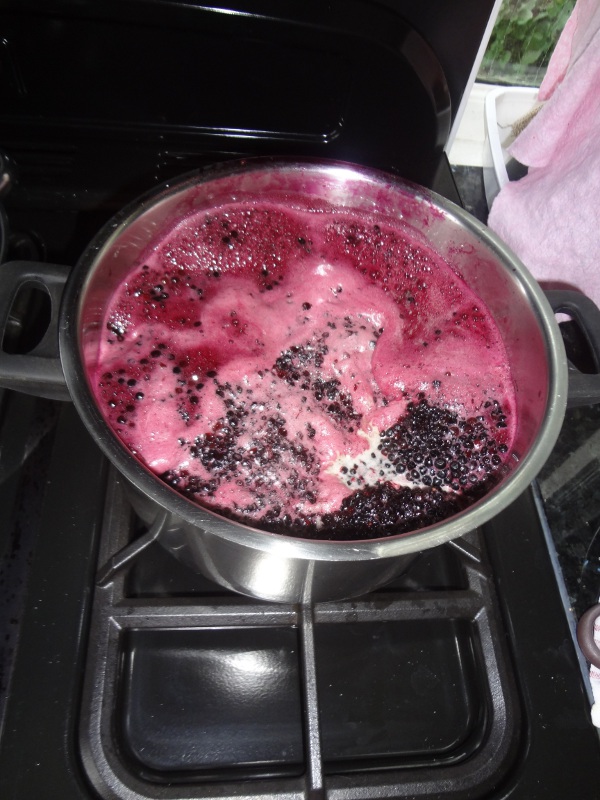
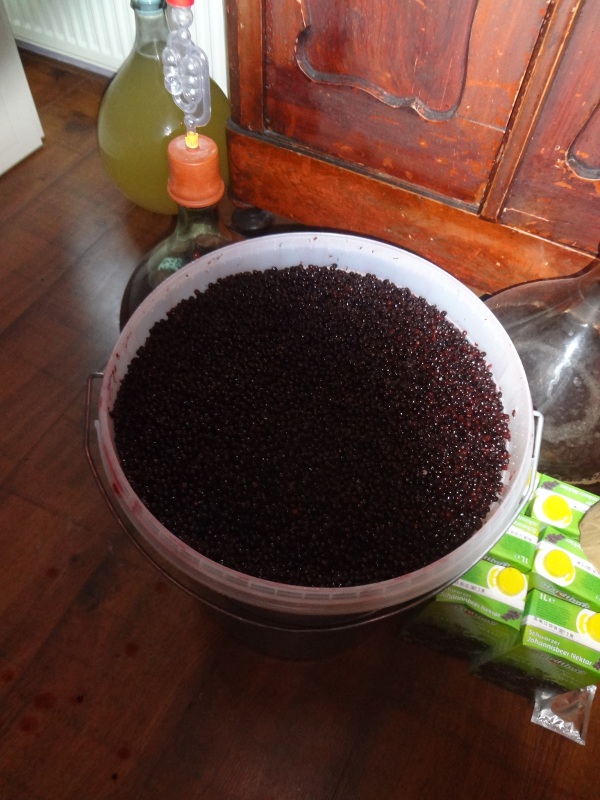
Apple gate

In the past I have made apple wine several times. It is a very nice base and you can combine apples with other kinds of fruits to make it more interesting. Most of the times I used apple juice from the supermarket and it always works fine. It usually needs a little bit more acid and citric acid is my favorite, but if you like you can add some lemon juice instead.

I also made apple wine from fresh apples that I got from a friend. Since it is a bit hard to get the juice out of the apples without a tool like this I didn’t make it often.

This year I was happy to make it. With my improved juicer it was fun to get the juice. Since it was not enough I also bought 4 kg apples from the supermarket.

I made a measurement of the sugar and added some to reach about 11% alcohol. I knew that the apples from my friend are very acidic and therefore I decided not to make a measurement at all. I don’t like to use chemicals to get some acid out of the wine. If it would prove to be too sour I could add some sugar just before drinking or I could blend it with a wine that is not sour. We will decide later.

So I put the apple juice and the sugar in a bucket, rehydrated the yeast and also added it. To my big surprise the fermentation sort of started, but stopped very quickly. This has never happened to me before!

There it is again; The question that I asked myself many times “What happened?”

I have no doubt about the yeast, and the apples from my friend. I have used them before and I know that yeast absolutely love apples. The only new thing were the supermarket apples. It did not take a long time before I realized that these apples are treated with some kind of poison to protect them from bugs.

So that is it! The yeast was poisoned! I could not believe that there was still enough poison in these apples to stop the fermentation. As a child we were always told “Snack healthy, eat an apple.” (Poorly translated from Dutch) I seriously have my doubts about how healthy apples really are.

Since I had 15 liters of juice I did not want to give up immediately. I decided to make a very big yeast starter to see if I could get the fermentation going. So I bought a big bottle of apple juice and made a starter. Now I had a big, big army of yeast on my side. So I added 1,5 liter very active starter to the bucket. It started to ferment but I was not happy with it. Fermentation became slow and eventually stopped again. I could not believe it. How much poison is in these apples?

So I decided to follow the advice given in some books. The procedure is as follows:

  • Make a starter with apple juice or whatever you usually use.
  • When the starter is very active add the same amount of the “not fermenting juice” to it.
  • When the starter is very active again, add again the same amount of juice. (Double as in the previous step.)
  • Repeat this until all the juice is fermenting.

Since I never tried it before I was not so sure it would work. The juice already killed an enormous amount of yeast before so why should it not kill again?

But I still wanted to try. Otherwise I had to throw away a lot of work. So I bought another bottle of apple juice and made another starter. This time I used champagne yeast. I know that it is recommended for restarting fermentations also in beers.

I followed the procedure but in the beginning I added less “poisoned juice” just to let the yeast get used to it. (Again I pretend that yeast act like humans.) The fermentation was still slow and I did not believe it would work. I thought that the yeast would be killed again when I would add more and more of the poisoned juice.
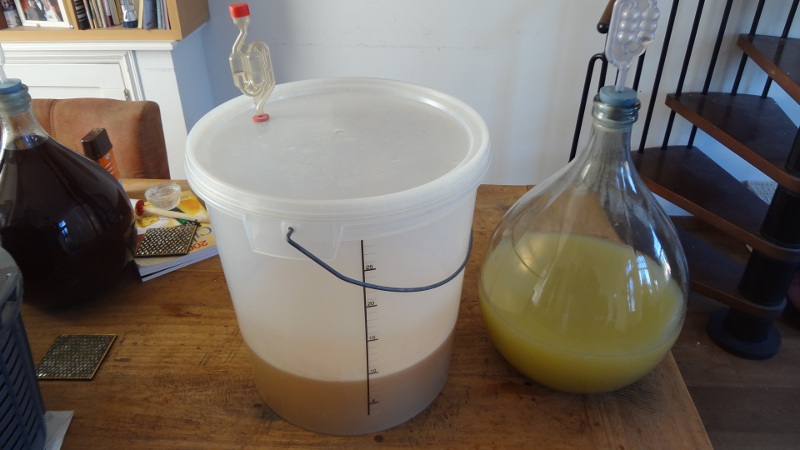
Fermenting most                          Poisoned apple juice

But I slowly increased the amount of juice and also shook the bucket several times to get air mixed in. Oxygen is important for yeast growth and they could use all the help I can give.

And to my surprise the fermentation became faster. More and more bubbles through the air lock.

Now all the juice is in the bucket and fermentation continues. No bad smells. Things are looking good.

I celebrate the victory of my champagne army!

Cheers

Hans

P.S.

Why the fermentation of these apples was so troublesome I don’t know. Saying that apples are poison without proper knowledge may be considered a little dramatic.

Posted in Bira, Şarap | Yorumlar Kapalı

Wake up!

In cheese making there are basically 2 sorts of bacteria that do the work. Bacteria that work at “low” temperatures and bacteria that work at “high” temperatures. Mesophylic and thermophylic cultures.

For me as a hobby cheese maker I have access to one variety of each. I know that there are more varieties but I simply don’t have them.

The thermophylic bacteria used for example to make Mozzarella, Leerdammer or Emmental are easy to obtain. A very knowledgeable member of this cheese forum advised to use Greek style yogurt because it contains several strains of bacteria that are very suitable for these cheeses.

So when I want to make one of the cheeses that require thermophylic bacteria I act as follows: I warm up the milk to the temperature mentioned in the recipe and I add 3 table spoons of yogurt per 10 litres of milk directly to the milk and stir it in. Very simple.

The mesophylic culture is a bit different. I store the “mother culture” in the freezer in the form of ice cubes. When I began this cheesy hobby I added the frozen culture directly to the milk. This did not work at all. It took much longer for the milk to coagulate. Eventually it did, but it made me very unhappy when milk remained milk when I was expecting sort of pudding. Since I was only a beginner I really became nervous and stressed. What was wrong? Did I use the wrong milk? Was the temperature wrong? Was the recipe wrong? Was the culture dead? Did I kill it with my sterilizing skills? This is not really a relaxed hobby.

Now I know a little better and I have to say that making cheese is a hobby that gives me a lot of peace in my mind. I find it very relaxing. Beer, wine, and cheese making are hobbies that made me think a lot about what could be happening.

So what could be happening that made the milk not coagulate?

I was making wine already a long time and in the back of my mind there is the knowledge that dried yeast needs some time to rehydrate and get used to the environment before they start to work. So I tried to imagine that I was a mesophylic bacterium that was frozen for months and then suddenly was put in 30 C milk. I think I would be rather confused and definitely not ready to go to work. Of course it is nonsense to pretend to be a bacterium but it still solved my problem.

So what I do these days is this:

In the morning I add a cube of the frozen culture to a glass of milk and cover it so nothing can drop in. After about 3 or 4 hours I start making cheese. By now the bacteria has converted all the milk to active “mother culture”. So when the recipe mentions 60 ml of mesophylic culture I use 60 gram of this “milk”. As a test you can smell the milk in the glass. It will smell sour.

I use the frozen culture for 1 year and then I make a new batch. Probably it can be used longer but I want to be sure that the culture is working instead of throwing away 5 or 10 liters of milk.

Hans

Posted in Peynir | Yorumlar Kapalı

The eternal burden of filtering

Usually I make wine from juices that I buy from the supermarket. This is wine making for the lazy. Which does not mean that I am lazy, or that the wines are not good. It is just the easiest way. Sometimes I make wines that require a bit more labour, like the wine from peaches.

They are a bit more work because you have to get rid of the solids. And I did that the wrong way for years. I see that now. Only recently I saw the light.

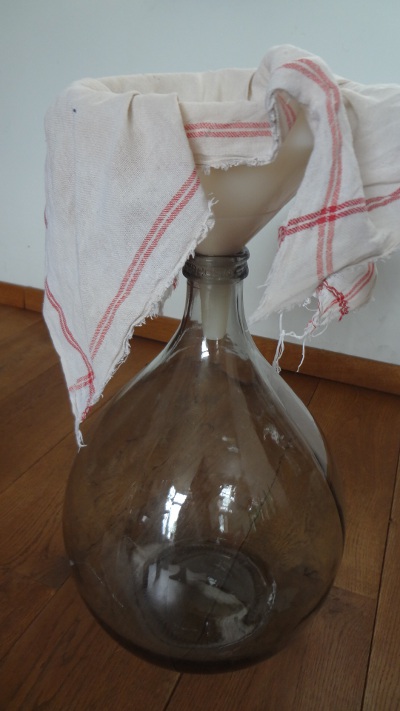
The way that I used to filter is as follows. I placed a funnel on a demijohn and covered it with cheese cloth. It works but it has several drawbacks. The cheese cloth gets soaked with the wine and when it hangs over the edge of the funnel the wine leaks out over the side. To prevent a wet floor I used this set up in the shower. The biggest problem however is that all the fluid has to pass through a very small hole that gets clogged all the time. I would lift the cheese cloth and squeeze it to get as much wine as possible. Usually the wine would squirt out the cheese cloth in places that I did not expect and it would not come out easily because the cheese cloth would completely be clogged.

When I started making beer I also bought a bucket with a coarse filter. For malt it works perfectly and I am very happy with it. Only recently I realized that this way of filtering also works very well with wine.

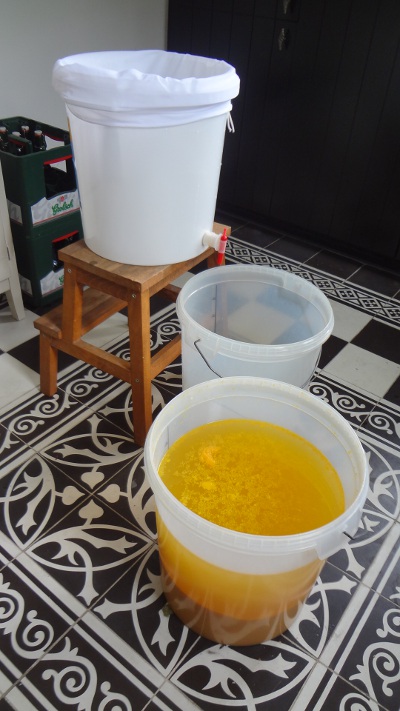
So here is the new set up for wine. A mashing bag is hanging inside a bucket. I empty the bucket with the wine/most and solids in this bucket and let it drain inside the third bucket. It works so much better. Because of the greater surface the wine can easily pass through the filter. There is a lot less work, less mess, and less wine remains in the solids in the bag.

The funny part is that beer making has given me this idea. And I also use the filter as you would in beer making. After filtering I have to add some water to reach the intended volume. In the past I would add this directly to the demijohn. Now I pour this water over the mashing bag so the last juice and sugar can drain out of it.

Cheers.

Hans

Posted in Şarap | Yorumlar Kapalı

The Monster Juicer

Years ago I was given a lot of apples to change into wine. This presented me with a problem. Apples contain juice but how do you get it?

The answer seemed to be the fruit juicer we had. I started juicing the fruit rather optimistic but that changed rather quick. After only a few kilos the machine was smelling of burning electronics. It did not go very well. I became a little frustrated because a mountain of unprocessed apples was looking at me.

About 15 minutes later my little frustration had turned into a mild rage. I decided that one of us was not surviving this day. So I burnt the puny, sad, incompetent machine. “I love the smell of napalm in the morning” was a phrase that came to mind. My lust for destruction was satisfied and the rest of my aggression was ventilated on the poor apples. The apples won and I never made wine from apples again.

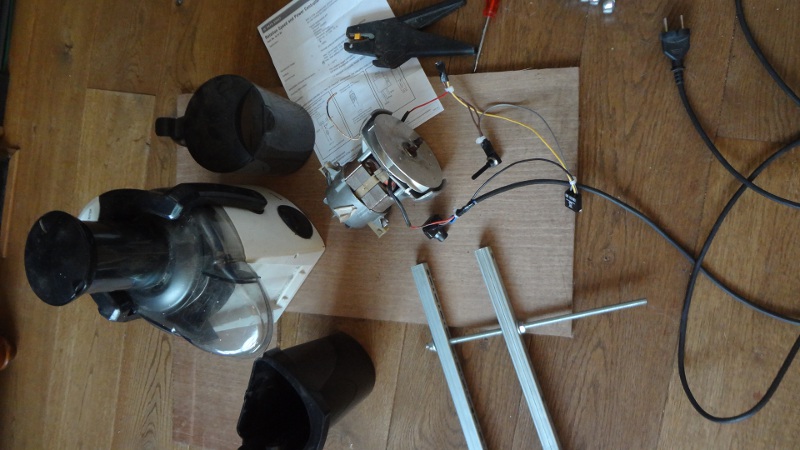
This kind of equipment is not really meant to be used for amounts that are required by home wine makers. I decided to keep the broken juicer because in the back of my mind I thought that I could use the parts some day. And finally I did!

It took forever. It was very difficult. And now it is very dangerous! I could give you the advice not to do this at home because all the safeties that were built in this equipment were removed and it was provided with AWESOME, TERRIFYING, POWER!

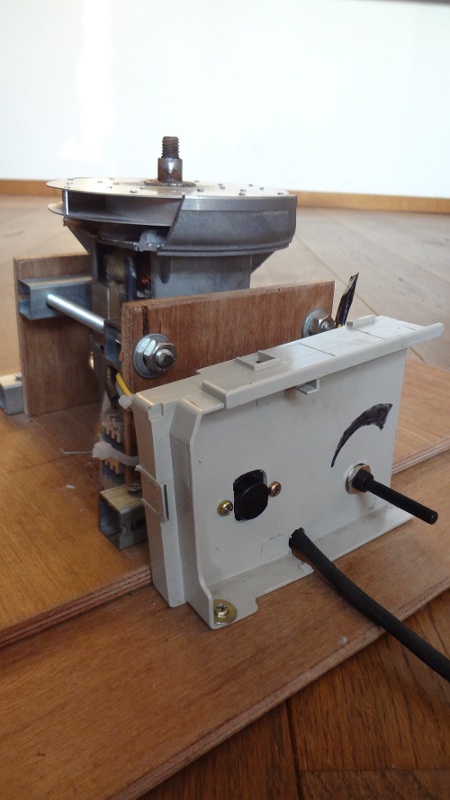
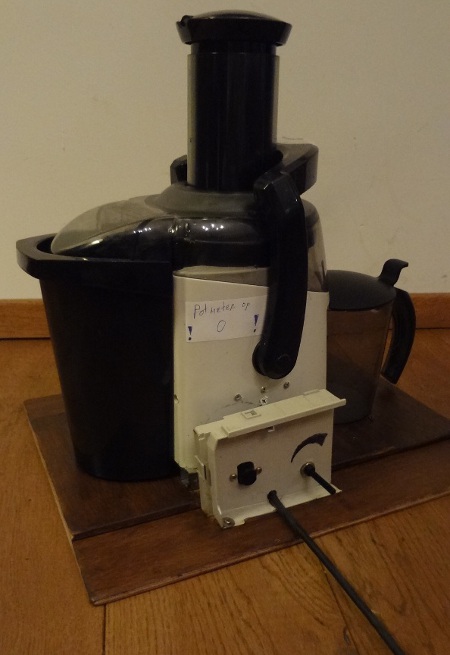
What you see here is a vacuum cleaner motor mounted on a piece of wood. It is controlled by a adjustable potentiometer and a component that is meant to control speed and power of motors. Don’t ask me how it works because I have no idea. I just connected it. I left the ventilator on the axis so it could cool the motor and would also provide some load. Otherwise the motor would be completely out of control.

It also took forever to make the motor fit in the housing. The diameter of the motor is at least double and it is also taller. But after a lot of cutting it fits.

Then there was the biggest problem. Connecting the motor to the rotating bit of the juicer. It was very difficult to center the part in exactly the right position. At this stage I almost gave up even though I was so close. There is no point in going into the details because you will not have the same parts as me but after a lot of desperate hours I managed to fix it in a “reasonable way”. Reasonable means actually that it is not very accurate and that there is some vibration at certain high rpm’s.

Today is a glorious day. Ha Ha Ha! Today I managed to make juice out of 3 kg apples. It gave me +/- 2 litres of juice which I think is very acceptable. It is working. I feel a little like Dr. Frankenstein because the parts were lying dead in a box for years and I gave life to a juicer.

In fact the new motor has so much power that I can safely say: I created a monster!”

It may look rather innocent but I am sure that it can also make juice out of a tree, or play the lead role in a very cheap horror movie.

Hans

Posted in Genel, Şarap | Yorumlar Kapalı

Pardon us

I’m feeling old.

And that is not strange because I am old. 47.

But it is not that bad. I am planning on becoming much older.

This story could have many other titles. For example: The arrogance of youth.

Since I am a technician I am always amazed in this age. Nowadays it is very simple to send a picture from one phone to another.

Let’s say that a picture is 1Mb. That is one megabyte. Which is 1.000.000 bytes. Which is 8.000.000 bits. Each representing a 1 or a 0. All these ones and zero’s are floating through the air and somehow find my phone. How many ones and zeros are surrounding us? In some way it is a bit scary.

It is very easy to look at the past and think that people used to be slow, ignorant, backwards and so on.

We, on the other hand have evolved so much that we are no longer happy with the beers that we can buy from stores. No. We can make beer ourselves. In this modern age you can buy every thing you need and produce your own beer at home. Nicer than the beers from stores and as pure as possible. Just water, malts, hops, and yeast. And I totally agree! Home made beers beat mass production!

But this is not the point of this story. This is!

As I said, I was feeling old. And I sometimes like to watch old movies which were still on television when I was young.

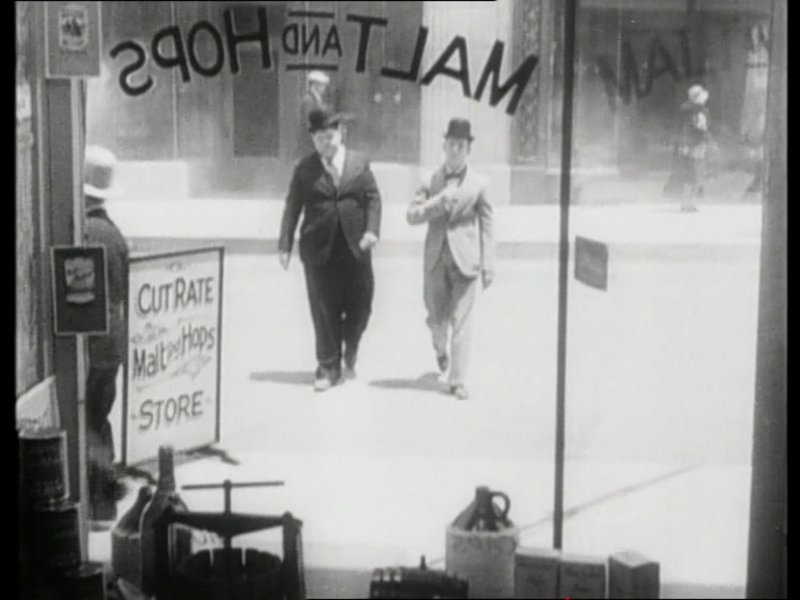
Laurel and Hardy in a 1931 movie. “Pardon us”. They are heading to a store which sells malts, hops and yeasts for the home beer maker!

It made me think of something that a teacher once said to me: We can reach for the sky because we are standing on the shoulders of big men.

Hans

Posted in Genel | Yorumlar Kapalı

And now, the end is near

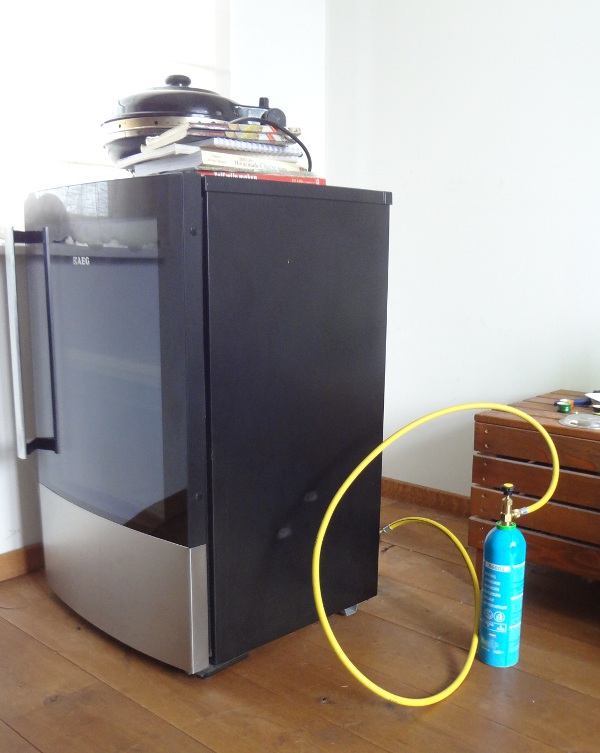
About 5 months ago I fixed my wine refrigerator/cheese cave and I was extremely happy with it. Against all odds it worked better than ever.

But of course my happiness could not last forever. And the timing was not great. I was making a Münster, the king of stink, and so I needed to keep the temperature at 16 C for a while. The refrigerator was only in use for red wine and seemed to be working fine. But when I placed the cheese in it and switched to 16 C I noticed that there was a problem. Again the motor became very hot and the sides of the machine remained cold. The coolant had leaked out.

At first I was not worried. It worked for 5 months and I can add coolant very easily. If you have to do that every 5 months it is not much of a problem.

So I added coolant and the machine was working again. For 1 day.

I don’t know why the leakage has increased and now I am worried. Every day I have to add coolant. It is not much work and I still have coolant but it is not cool. I tried to fix it with a sealant that is used for car air conditioners but it did not work. (Another 40 euro’s gone)

Since I spent a lot of time and money on it I am “a bit” disappointed. Now I have to face the fact that I am defeated. Another failure. It is a sad day and the refrigerator needs a breathing apparatus to stay alive.

Well, it isn’t all bad. I learned some things and I was happy and proud of my first success.

Would I try it again?

Definitely not!

Hans

Posted in Genel | Yorumlar Kapalı

Very Dutch Gouda,

That is a statement that I can make since I am Dutch, I use fresh milk from Dutch cows living on a strict diet of Dutch grass, and I use an “old” recipe from a Dutch cheese maker.

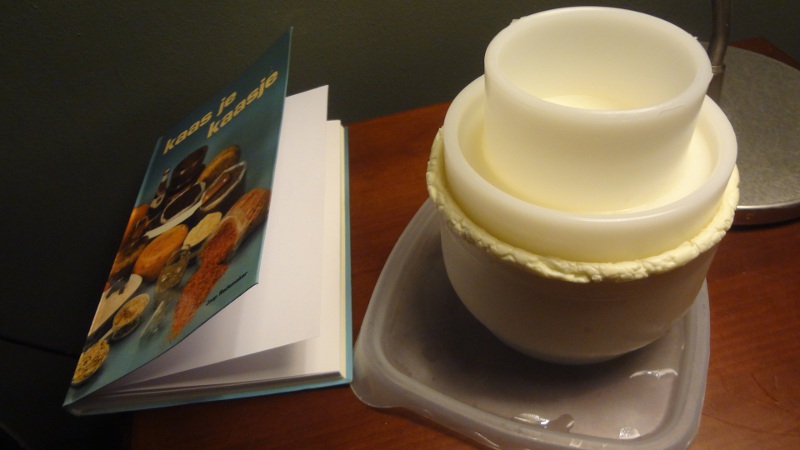
The recipe comes from the book “Kaas je kaasje” written bij Joop Rademaker. It means “Cheese your little cheese”. Which also does not make any sense in Dutch.The book is originally from 1982 but it has been updated by his brother (I believe) in 1987 according to the knowledge of these times! Yes, I feel nostalgic.

It is a small book with only 1 recipe! But with this recipe it explains quite a lot about the steps in making cheese.

Normally I believe that I don’t have much to add to the cheese making world but perhaps somebody is interested in an at least 30 year old recipe of a dead Dutch cheese maker.

Here is his recipe for 9 liters more or less in his words. (He does not waste a lot of words)

  • Milk 9 litres
  • Add mesophylic culture 1% or buttermilk 2%
  • Heat milk to 29 C
  • Add 36 drops of rennet 2,25gr
  • Leave for 30 minutes
  • Cut and let rest 10 minutes Not clear how big to cut but he mentions pea size
  • Remove whey. 3 litres
  • Add hot water to 33 C while stirring Water should be 75-80 C
  • Stir 10 min
  • Remove again 3 litres whey.
  • Add hot water again to 36 C. He warns here about not exceeding 37 C. It kills the bacteria and causes a defect in the finished cheese.
  • Stir 10 min
  • Cover and let ripen 30 min
  • Fill the mold. Place the mold in the whey and fill it there
  • Place the mold up side down for 10 minutes
  • Place cheese in a press and press for 30 minutes with half pressure. For cheeses 500 or 1000 gram, use 750 gram or 1500 gram weight
  • Turn cheese and press with full pressure (1500 gram or 3000 gram) for 3,5 hours
  • Let ripen covered but without cheese cloth for 8 – 10 hours
  • Put cheese in brine for 6 – 12 hours.
  • Coat cheese after 24 hours
  • Keep cheese in a cool not too dry space for example your basement. Turn daily for a few weeks. Weekly later.

Each step has it’s own small chapter in the book with some how and why’s. I tried to include the important remarks.

As you can see he does not use Calcium chloride. If you do not have fresh milk you should!

What I was most surprised about was the pressing mentioned in the recipe. As you can see it is only very lightly pressed compared to recipes found in other books or the internet.

I made it this way a few times and never had the patience to let it mature. Eaten after a few months it is already a beautiful cheese. Tasty, soft, young.

I don’t know if it is a Dutch habit but what we do is the following: We cut the cheese in blocks of about 2x2cm and gobble it away with some mustard. Sharp French mustard or (for an old sharper cheese) better a mustard with some honey.

BUT if you want to taste cheese it is so much better to take the cheese out of the refrigerator 20 minutes on beforehand and cut the cheese in much smaller parts and eat them with a glass of wine saying AAHHH after each bite. It really increases the experience!

Hans

Posted in Peynir | Yorumlar Kapalı

Home made Soap, Season 1, Episode 1

Ages ago I was living in the house of my grandmother who was on holiday for 6 months. At that time war broke out in Iraq. Personally I don’t think you can call it war if people with rifles are fighting people in tanks and jet fighters, but that is another story.

When the war began my grandmother called me and told me to buy soap. As much as I could. I thought it was a very strange request so I checked with my mother what I should do. She also did not understand so we decided not to do anything.

About 2 years ago I read a book about a group of Jews living in Amsterdam during WWII. They tried to make a living by starting a soap factory. Since they did not know how to make soap this turned out to be very difficult.

I finally understood why she wanted me to buy soap. I never realized that soap is so important but apparently it is even more important than being able to check your facebook page….

I decided that I wanted to learn a little bit more about it. To my surprise I found that it is very simple to make soap so I wanted to try it.

A small word of caution: One of the ingredients is very aggressive and therefore this is not something that you should try with your children, even though it looks like fun.

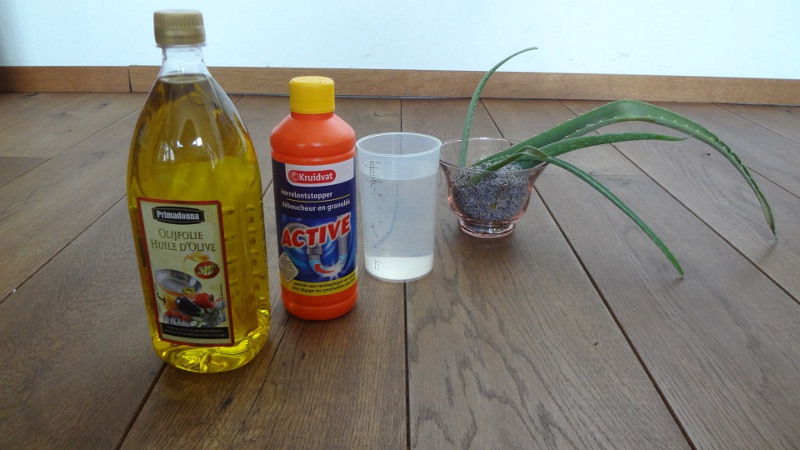
Ingredients for 12 pieces of soap:

  • 500 gr. Olive oil
  • 64 gr. Drain cleaner pellets (Check the label. It should be 100% Sodium hydroxide (NaOH))
  • 178 gr. Water

Method:

  • Carefully add the drain cleaner to the water. This will become warm.
  • Warm the olive oil until it is approximately the same temperature as the water / drain cleaner.
  • Add the water / drain cleaner to the oil.
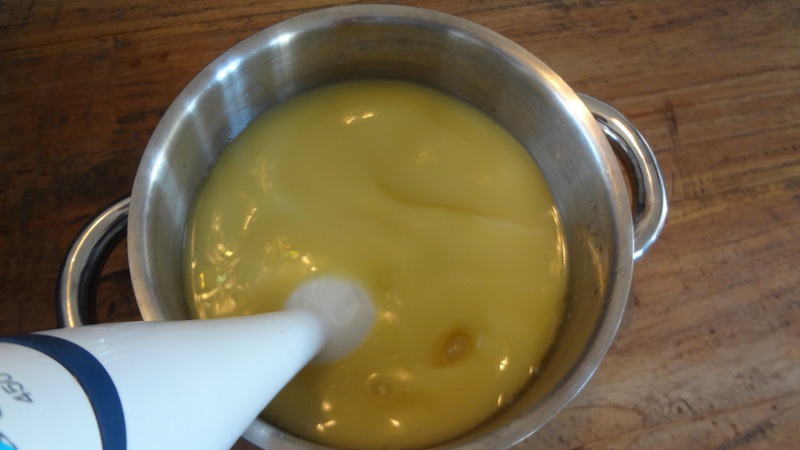
  • Mix for about 2 minutes with a blender. The mix becomes a bit creamy.
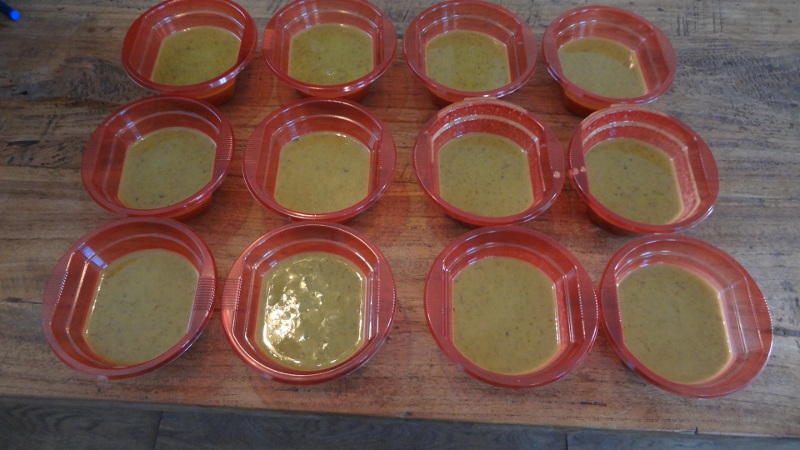
  • Pour the soap in moulds (I used disposable sauce dishes)
  • Wait for 4 to 6 weeks.

This is the basic recipe for soap. Could it be more simple? It smells and feels like old fashioned soap. (And it even cleans like soap.) So far this was a great success.

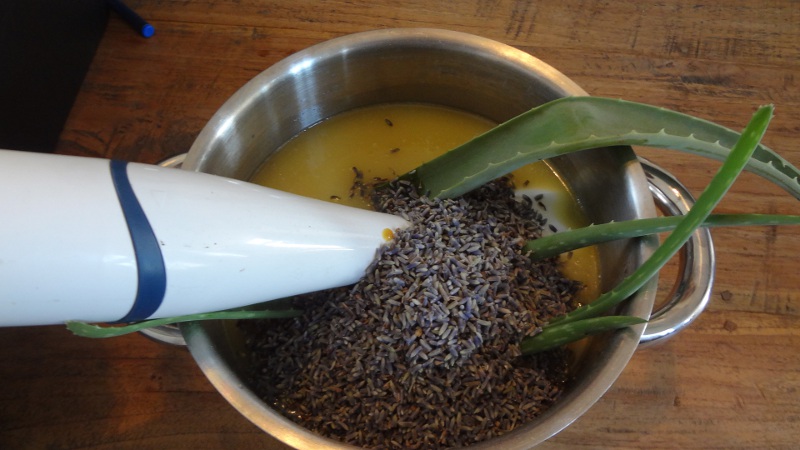
The next step was to add some scent and some health. So I made a second attempt with dried lavender flowers (25 gr.) and a few leaves of my aloe vera. It takes some time but after some months the soap starts smelling more and more like lavender.

The ingredients

The cream starts to smell soapy

Mixing in the lavender and aloe vera

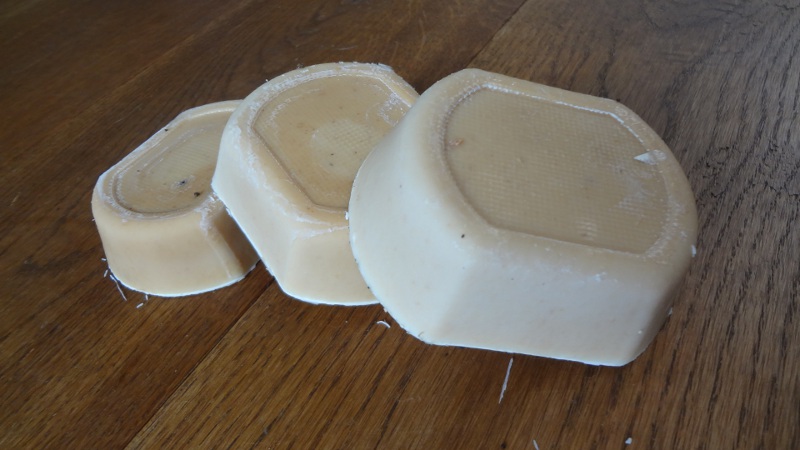
12 pieces of soap

The result after a few months

When they are finished I will definitely make it again. But I think that I have enough soap for a few years now. So no new episodes in the near future.

Hans

Posted in Genel | Yorumlar Kapalı

Peachy!

Winemakers all over the world will probably hunt me down and lock me up in a deep dark prison cell  far way from the outside world for writing stories like these. This is a story about peach wine. Even more horrific: Canned peach on syrup from Lidl, wine.

I have made this wine several times. It is not as easy as making wine from apple juice but it still is much easier than growing grapes, harvesting them, and making wine from them. For your ingredients you can go to a supermarket and buy them.

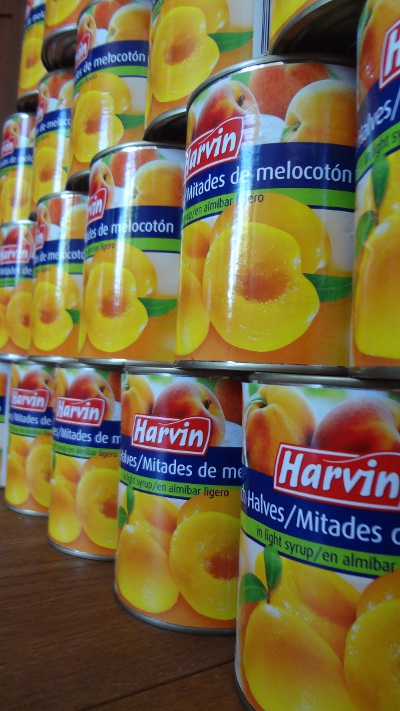
Peaches on syrup in a can!

Since I have made it before I did not make the measurements again. I am sure that the values don’t change a lot.

What is the goal? How do we get there?

I would say that we want to make a white wine of approximately 12% and acidity 6. Since I made it before and liked it I am going to make 25L.

In the past I decided to use 1 can (820mL) per liter wine. You probably would be interested how I determined that. Unfortunately I cannot answer that. It was just a guess.

I measured the acidity in the past and it was about 3,5. So per liter I have to add 2,5 gm of tartaric acid to reach 6. This means 67,5 gm for 25L. Tartaric acid would not be my choice for a white wine so I would choose citric acid instead. Citric acid is more acidic than tartaric acid so I use approximately 85% which is 55 gm.

Then there is a slight problem. How do you determine the sugar content of a peach? The hydrometer and refractometer are not really an option for obvious reasons. But here you are saved by the manufacturer. It is written on the label! 13,5 gm sugar per 100 gm peach + syrup. (That is really a lot isn’t it?) Since the content of the can is 820 gm, each can contains 110 gm of sugar. Since I use 1 can per liter wine we have to add 108 gm sugar per liter for an alcohol percentage of 12%. Which is 2700 gm for 25L.

In the past I made the wine with a standard white wine yeast. This time I want to try it with champagne yeast because this type of yeast flocculates well and so far has given me very clear wines. (Which can be a bit of a problem with peaches)

I do not believe that yeast nutrition is necessary because of the amount of fruit. (If you have it, use it to be on the safe side.)

What I believe is a good thing, are pectolytic enzymes to help break down the cells of the fruit. If you don’t have them I am sure that you still can make this wine, but perhaps it will remain hazy, (Which is only an optical issue if you want to make it an issue) and give you more work.

So here is the list of ingredients:

  • 25 cans of peaches
  • 2700 gm sugar
  • 55 gm citric acid
  • pectolytic enzymes
  • champagne yeast

And here is what you do:

  • Sterilize 2 buckets with sulphite and citric acid solution.
  • Leave the solution in 1 of the buckets for cleaning (and blending) purposes.
  • Put a teaspoon of sulphite in the other bucket (approximately 2.5 gm) for security.
  • Open a can and pour the liquid (not the peaches) in the bucket with the teaspoon of sulphite so the blender can fit in the can.
  • Place the can in the bucket with the sulphite solution (to sterilize the outside of the can) and use a blender to mash the peaches. Repeat this with the 25 cans. Try not to overheat the blender. Most of them are not made for these quantities.
  • Boil a few liters (Not too much) water and dissolve the sugar and citric acid. Mix it with the blended peaches.
  • Add a few tablespoons of the pectolytic enzymes and mix them with a clean spoon.
  • Leave the bucket for a night or more so the enzymes have time to do their destructive duty.
  • Hydrate the yeast as usual and pour it over the peaches.

Since there are many fruit particles in the most you need plenty of headspace in the bucket, and you need to shake the bucket a few times per day to mix the floating fruit back in the fluid.

After about 2 weeks the not so nice part starts. You have to filter out the fruit. So far I have not found an easy way to do it. (I did recently) The fruit particles are so fine that they clog up a filter (or cheese cloth) very quickly. So take your time and remind yourself that it is for a good cause. After filtering, add water to 25L.

This is one of the wines that I rack a few times because it contains so many small particles that take their time to settle. You need patience for this wine but I think it is worth it.

The result.

Unfortunately I do not have a picture of the previous versions. But I still have my notes!
“It took a long time to become clear and produced a lot of sediment. It actually did not completely clear up in the demijohn but in the bottles which contained some sediment.
Because of the long time it took to make this wine it became special. It aged well. It was a very good white wine with a slight aroma of apple. You can barely taste that it was made from peaches but when I tell my guests that it is they recognize it. It is a fruit wine that is very accessible to the “normal” wine drinker since the taste is very similar to “normal” wine.”

Try it and may the patience be with you.

Hans

Posted in Şarap | Yorumlar Kapalı

Wine for the King: Elderberry!

“Did your fish die?”
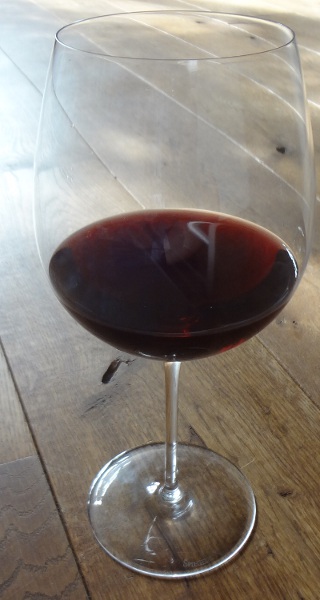
“No, this is actually a wine glass.”

A special wine glass, for special wines. I bought it to be part of the snobbish wine people. It is crystal and very expensive for a stingy Dutch person as me. But sometimes you have to buy yourself a present right?

I don’t use it unless I have a special wine and that is what is in it today. Elderberry wine is proof that a home winemaker can make wine as good as professionals. Maybe even better because a home winemaker does not have to worry about regulations, financial risks, complaining customers etc.

Making red wine has been a great struggle for me because there are no grapes in the Netherlands. Yes, we have grapes in the supermarket but they are not suitable for making wine. I almost gave up but then I “discovered” elderberries.

A lot of them are growing where I live and in 2009 I made my first 10 liters. I tried it after 6 months because I was very curious but it was undrinkable. Extremely harsh tannins. I did not think that this could work out but after 2 years it was a great wine. It completely changed in the bottles. Fascinating. Since then I make it every year. It is a lot of work and you need a lot of patience but I think it is the best red wine in the world. It is strong, has a beautiful color, very natural, full bodied. It can compete with the best.

Not to mention that elderberries seem to be very healthy

Preparing the berries.

  • Pick as much berries as you possibly can. Leave them in a shed or outside for a night so the spiders and other bugs can crawl out.
  • De-stem the berries. I have not found an easy way to do this. I read somewhere that you should freeze them first but that does not work with these big quantities. So you have to do it the hard way.

  • Place the berries in a bowl of water to clean them. The ones that are not ripe will float to the surface. Throw them away.
  • Put the berries in small bags and place them in the freezer until you have enough.

Making the wine.

These are the specifications to keep in mind. Strong red wine, not acidic: 4 or 5, a bit high alcohol percentage: 13%, amount: 25 liters.

I measured the sugar contents a long time ago and there is very little sugar in these berries. Only 300 grams in 7 kg. Unfortunately the berries are so dark that it is impossible to make an acidity measurement with the test kit. Since I think there should not be too much acid in the wine I decided not to add any.

Based on the above and previous tries I use the following recipe:

Ingredients for 25L:

Method:

  • De-freeze the elderberries in a bucket the night before.

  • Boil and mash the berries with some water, the sugar and the bananas.
    There are three reasons to do this:
  1. The internet claims that they contain “toxic” Sambunigrin which leaves when the berries are boiled.
  2. So far I have not sterilized the berries.
  3. By boiling the berries you also get more juice from them.
  • Place the hot juice in the fermentor and add water to approximately 20 liters.
  • Wait for the bucket to cool down.
  • Dissolve yeast nutrition and add it.
  • Hydrate your yeast and add it.

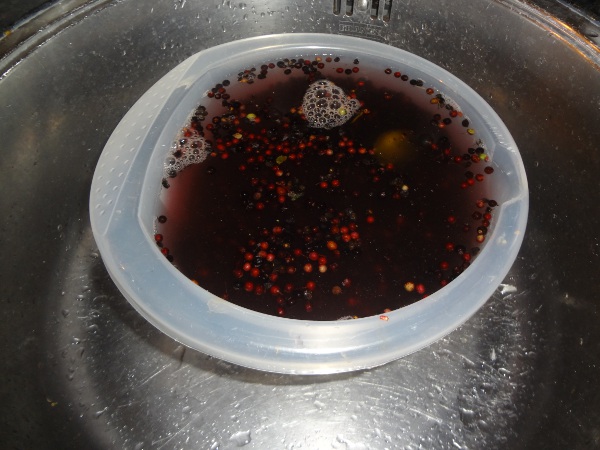
During the first few days you can see that the skins of the berries are pushed upwards by the CO2 gas. You need to have space in the bucket otherwise the skins will block the air lock and possibly the lid will be forced to violently leave the fermenter with colorful -mainly red- consequences for the interior of your house.
Shake the (closed) bucket vigorously a few times per day to get the skins in the fluid.

  • After 7 to 10 days, take the berries out of the most, squeezing the liquid from them. This is usually a little bit messy and the berries can leave terrible stains. They really are like paint.
  • Place the most in a 25 L demijohn.
  • When the fermentation has calmed you can add water  to 25L.
  • After a few months you can rack it and then leave it for a long time.

The wine is ready after 2 years and can be kept for a long time.

Cheers

Hans

Posted in Şarap | Yorumlar Kapalı